Migrating from Heroku to Hatchbox (easier than you think)
I have been using Heroku for the last decade and it has served me well. At the time it was released it was pretty revolutionary and The Twelve-Factor App principals were ahead of it’s time. However, Salesforce bought Heroku back in January 2011 (almost 15 years ago) and the platform has hardly evolved since. It feels like it has been in maintenance mode for years. That stagnation shows up in the pricing, too; what felt right for 2011 no longer makes sense in 2025.
Pricing aside, Heroku is strict about its dynos and you don’t get full server access which makes it hard matching versions of Ruby or Node with the buildpack configuration and can turn into a puzzle.
Meanwhile, tools like Kamal have matured and providers like Hetzner make cheap, powerful servers easy to access. I have been weighing alternatives to Heroku for a few years. Kamal is appealing, but I still like having a slick Heroku-style UI for configuring my apps.
With all that in mind, I decided to try Hatchbox. I kept seeing people rave about it, and knowing that Chris Oliver from GoRails built it gave me confidence it was worth testing. I used Laravel Forge back when I shipped Laravel apps a decade ago, and Hatchbox immediately felt familiar in the best ways.
Long story short: I switched all of my apps from Heroku to Hatchbox in a single day and came away impressed. I deployed a very modern app—Friends Weekly—running Rails 8.1 and Ruby 3.4, and it worked without a hitch. I also deployed a slightly older app—Bootstrap Email—running Rails 6 and Ruby 2.7, and it worked on the first try. I honestly couldn’t believe it just worked. I was struggling to even get the app running on my laptop or on a newer Heroku stack, yet Hatchbox handled it flawlessly. I was extremely impressed and wanted to share the migration process in case it helps others do the same.
Here are the steps we will go through to set up and migrate from Heroku to Hatchbox:
- Set Up Accounts
- Create Hatchbox Cluster
- Create Your App
- Starting to Migrate
- DNS
- Set up SSH
- Connect to Old and New DB with TablePlus
- Maintenance Mode
- Backup Heroku DB
- Restore to Hatchbox DB
- Bonus Features
Set Up Accounts
- Create your Hatchbox account.
- Create your Hetzner account, which you will use to provision servers. Hatchbox works with several VPS providers, but Hetzner is popular and very inexpensive compared to other options.
Create Hatchbox Cluster
- In Hatchbox, go to
Servers, clickNew Cluster, and select Hetzner. - You will need a Hetzner API token. In the Hetzner Console, select your
Defaultproject, chooseSecurityin the left nav, switch to theAPI Tokenstab, and clickGenerate API Token. Give itRead & Writeaccess. - Copy that token back into Hatchbox and create the cluster.
- For my apps I selected Web Server, Cron, Background Worker, and PostgreSQL roles, but pick what your Rails app needs.

Create Your App
- In Hatchbox, open
Appsand clickNew App. - Select the new cluster, name your app, and click
Create App. - Connect to your repository. I used GitHub, which also makes auto-deploys easy to configure later.
Starting to Migrate
- Your app now exists in Hatchbox, so it is time to move things over from Heroku. We will start by moving the app over but leaving the database on Heroku for now.
- Move every environment variable from Heroku into Hatchbox. Find them in the Heroku settings and copy them into the app
Environmentsettings in Hatchbox. Whether you use.envstyle variables or Rails credentials, it all works the same. When using credentials, theRAILS_MASTER_KEYvariable decrypts the production credentials file. Make sure you copy over theSECRET_KEYfrom Heroku, or delete theSECRET_KEYif it’s in credentials, so sessions and users stay logged in through the migration. - This process assumes your Rails app uses a
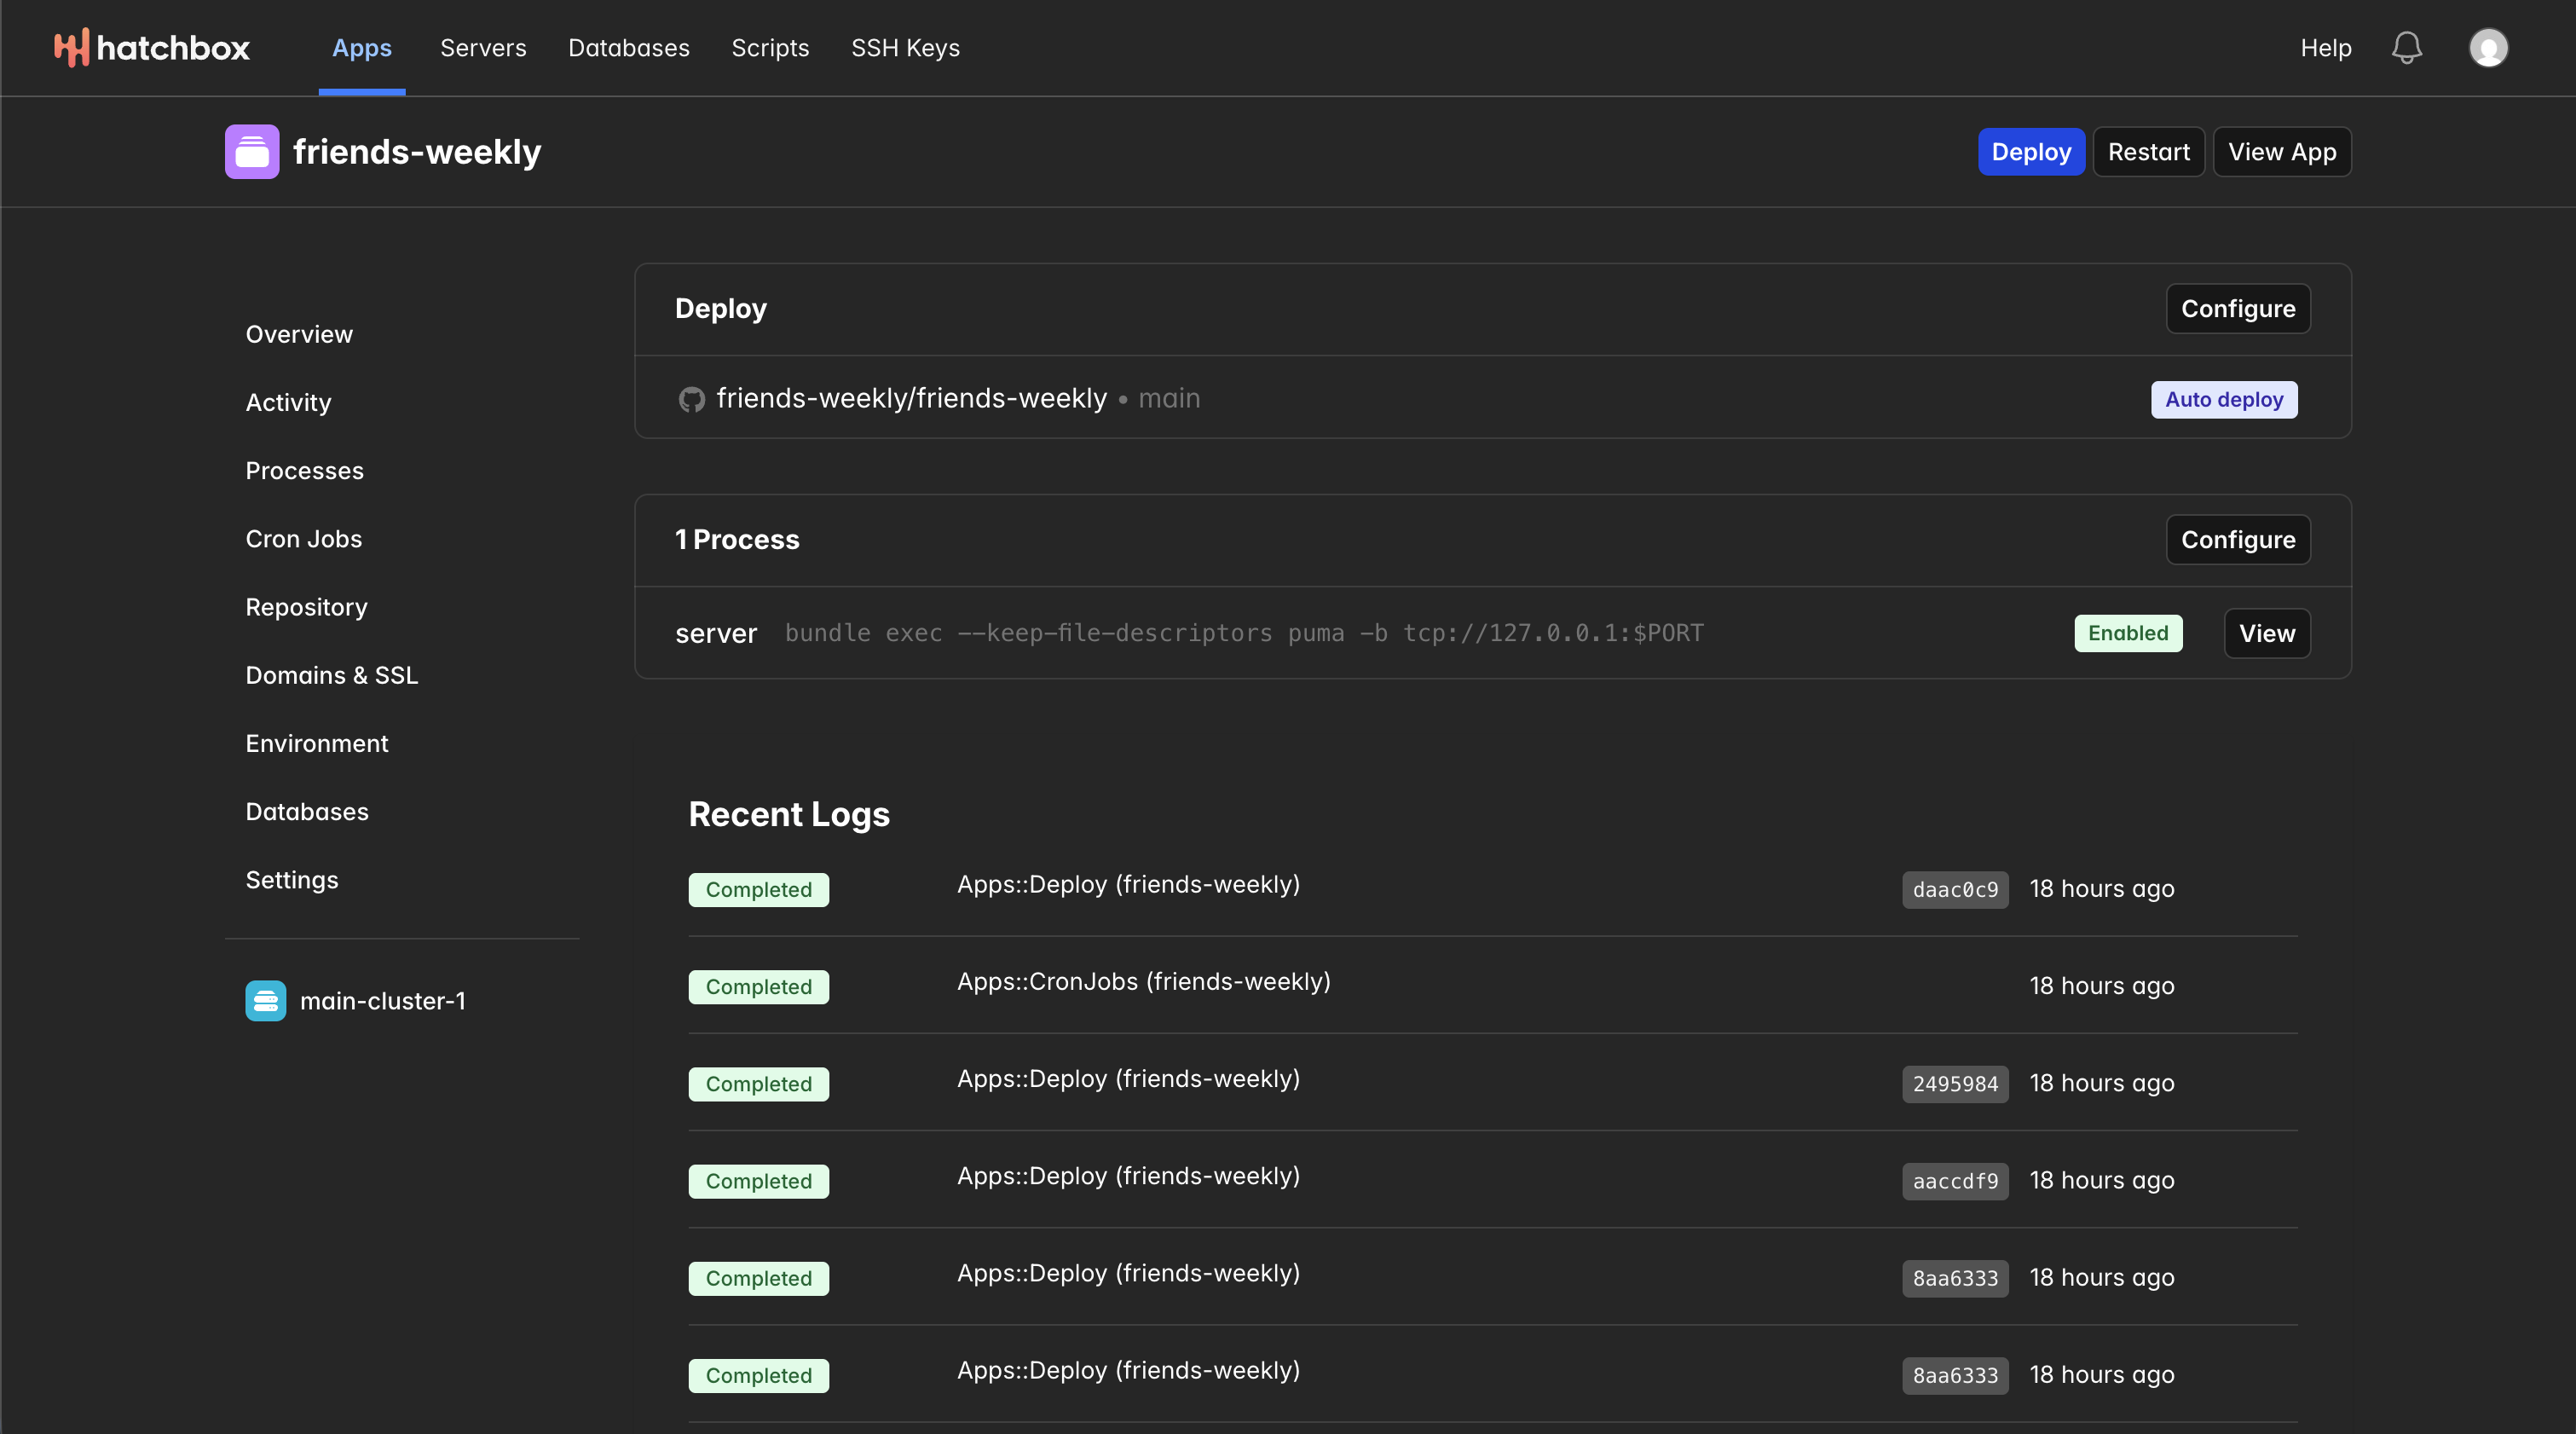
DATABASE_URLon Heroku. Copy that variable as well; we will deploy to Hatchbox while still pointing at the Heroku database for now. - Hit
Deployin Hatchbox to deploy your new app. Check the recent logs to confirm it deployed successfully. Click theView Appbutton in Hatchbox to ensure the app is running properly in the browser 🎉
- Move every environment variable from Heroku into Hatchbox. Find them in the Heroku settings and copy them into the app
DNS
- Go into
Domains & SSLand add your site’s domain name. Hatchbox will generate a domain and IP address pair. - Update your DNS provider to point the domain to the new Hatchbox IP instead of the Heroku record.
- Your domain now points to the app running on Hatchbox and Hetzner, while still using the Heroku database under the hood.
Set up SSH
- Hatchbox has a firewall setup so that the databases can only be used on your Hatchbox server for security reasons. So we first need to set up SSH so we connect to the Hatchbox server from our computer.
- Run
ssh-keygen -t ed25519in your terminal. - Hit Enter to accept the default file name.
- Create a password, I saved mine in 1password. If you use 1password you can also save SSH keys.
- Run
cat ~/.ssh/id_ed25519.pubto print the public key and copy it. - Go to
SSH Keysin Hatchbox and clickNew SSH Keyand paste the newly generated public key into Hatchbox and save it. - To test the connection, go into your server on Hatchbox, click
SSHfrom the left tab. You will see a line that looks something like thisssh [email protected], paste it into your terminal and you should be able to connect to the server following the steps.
- Run
Connect to Old and New DB with TablePlus
- Now we will connect to the old Heroku and the new Hatchbox database.
- Download TablePlus.
- Once installed, add a connection and choose
Import from URL. - Paste in the Heroku database URL from the env and connect and you should now be able to see your Heroku DB in TablePlus.
- Back in Hatchbox, in your app’s left nav, click
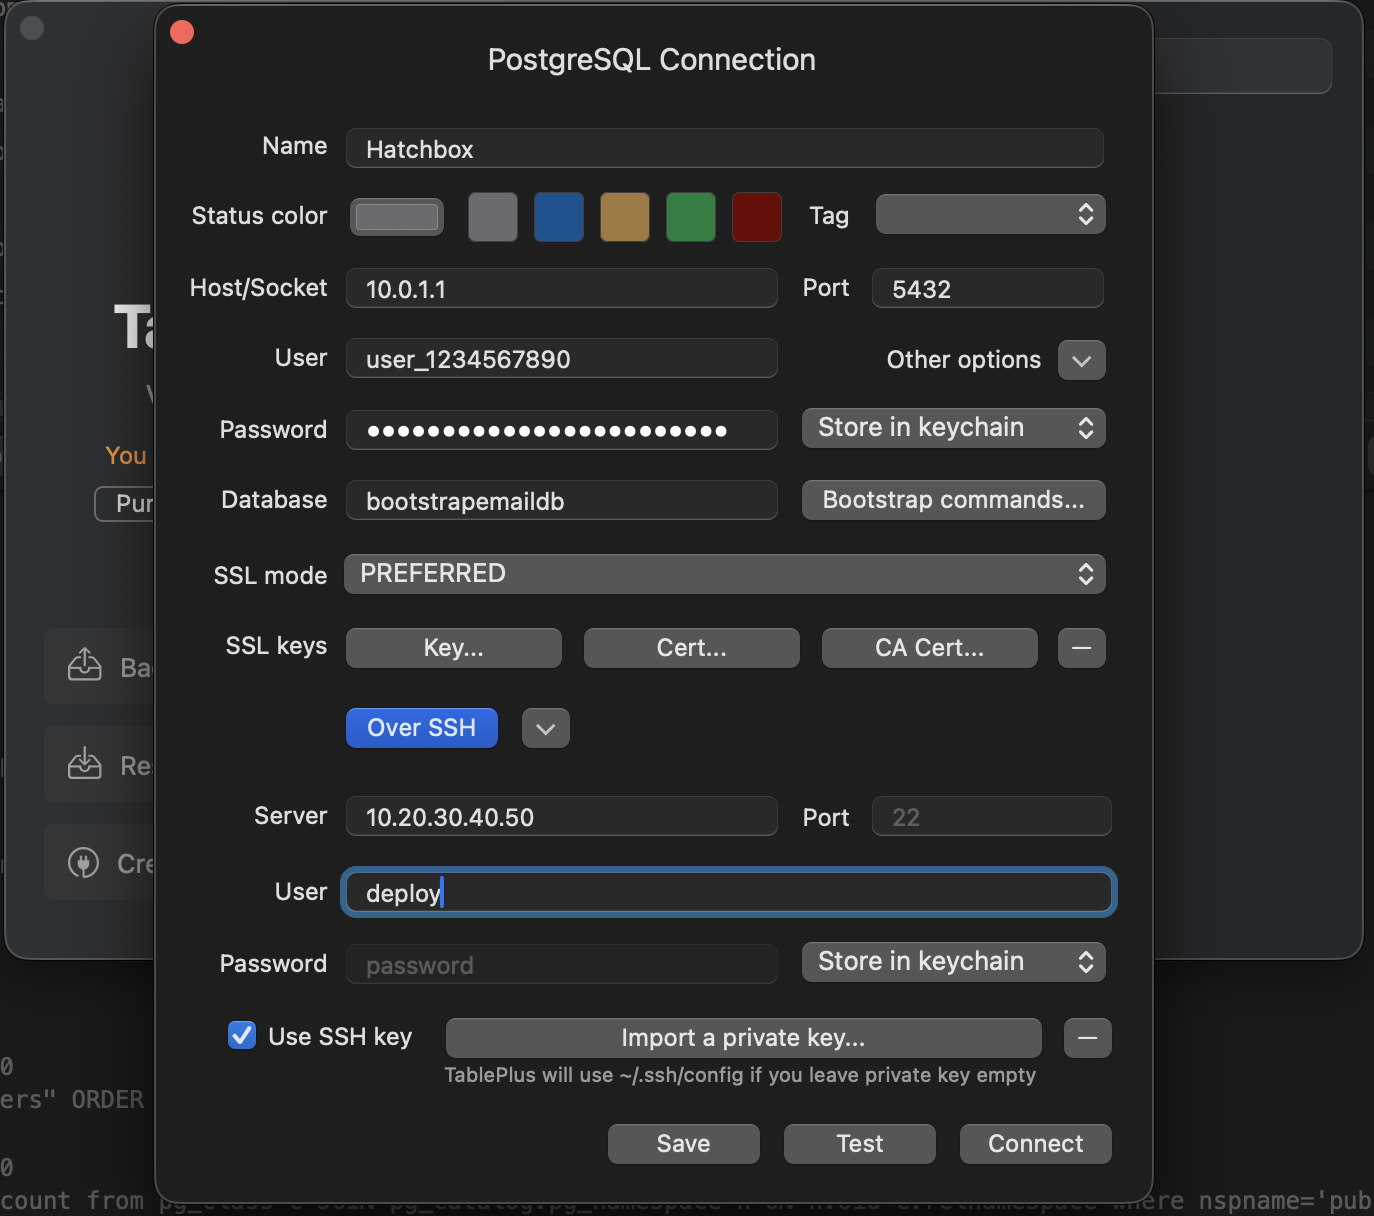
Databasesand create a new unmanaged database for your app. ClickViewin the database you just created and copy the database url. - In TablePlus, create a new connection for the Hatchbox database. Click
Import from URLto set it up. It will fill out the connection form but you need to click theOver SSHbutton to tunnel through your ssh connection. - The username and server IP need to be added to the ssh part of form, those values are the same as the ssh values you used to connect from your terminal above, something like
ssh [email protected]. So for example the username would bedeployand the ip10.20.30.40.50. - Check the
Use SSH Keybox and select the private key you generated on your computer at~/.ssh/id_ed25519.pub. - Test the connection and connect to the database.
You should now have your Heroku and your Hatchbox databases connected to TablePlus.
Maintenance Mode
- Put the Hatchbox app in maintenance mode so you can migrate the database without missing any writes to database in the process.
- Inside your app in Hatchbox, open
Settingsin the left nav. - Click
Enable Maintenance Modeat the top. This temporarily takes your app offline, and you should see a maintenance page if you visit your site.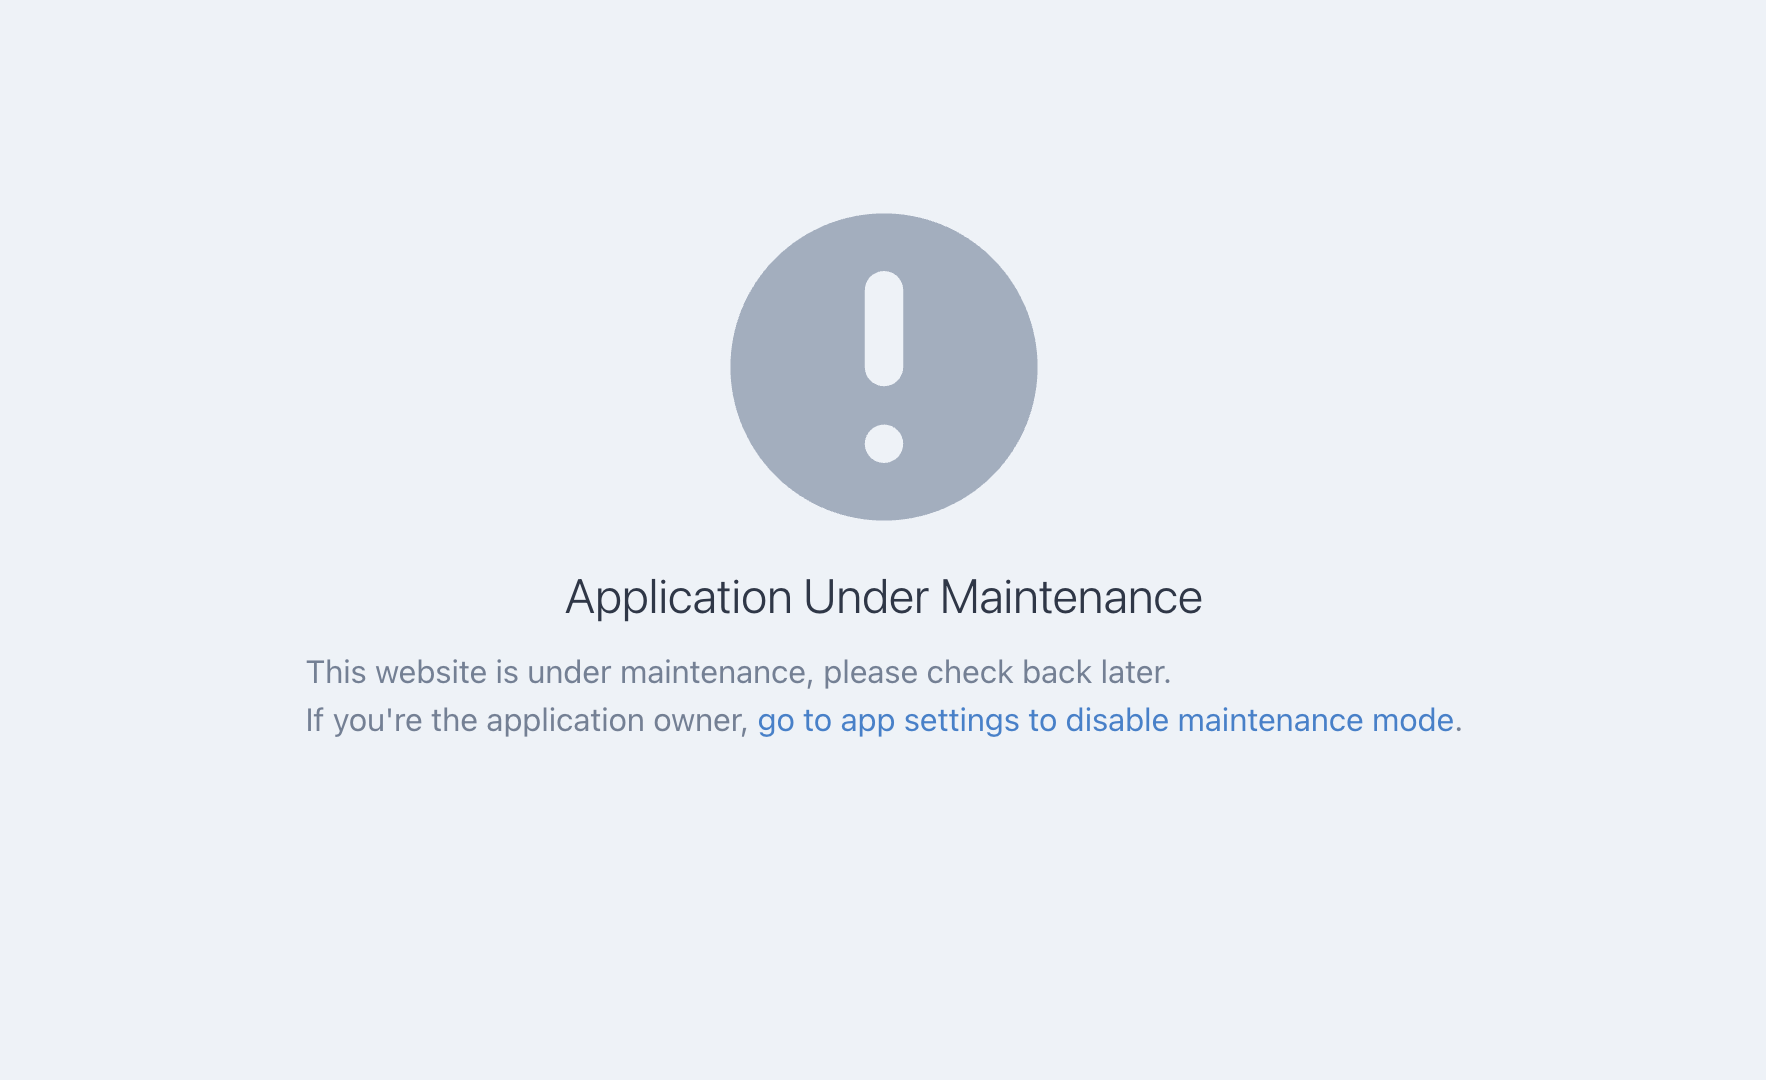
- Inside your app in Hatchbox, open
Backup Heroku DB
- Now it is time to backup the Heroku Postgres database.
- In TablePlus, click
File > Backupand backup and save the Heroku database somewhere on your computer. In my Heroku Postgres instance there were several databases, so make sure you select the one that matches the connection shown in the TablePlus status bar.
- In TablePlus, click
Restore to Hatchbox DB
- Now we will restore that Heroku backup to the Hatchbox PostgreSQL database.
- To start the restore, click
File > Restore, select the Hatchbox database as the destination, add the restore options--no-owner --no-privileges --single-transaction, and choose the backup file you created from Heroku.
- To start the restore, click
Bring Back the App
- Everything is ready, so we just need to update the environment and bring the app back online.
- Back in the app
Environmentsettings, renameDATABASE_URLtoHEROKU_DATABASE_URLand save. You could delete it, but renaming keeps it handy in case you need to revert quickly. - You should see another database URL, something like
RED_DATABASE_URL, which points to the Hatchbox database we created. Rename that one toDATABASE_URLso Rails uses it as the primary database. - Return to app
Settingsand disable maintenance mode. - You should now be able to load your app in the browser with everything running on Hatchbox 🎉
- Back in the app
Bonus Features
One of the best things about Hatchbox is the flat fee per server. You get access to every feature, unlike Heroku where only certain premium dynos or database tiers unlocked the good stuff.
One of my favorite features is continuous database backups to S3, R2, or any compatible storage service. Since the database is unmanaged, having an automated safety net matters. I set mine to back up the database daily to a Cloudflare R2 bucket that keeps 30 days of history and automatically prunes older backups so I am not paying for stale data. Each database gets its own subfolder, so I use one R2 bucket to backup all of my app databases in one place.
Another feature I appreciate is Cron Jobs. I used to lean on the Heroku Scheduler add-on to run scripts cheaply, but it was pretty limited. Hatchbox gives you full cron support, so migrating any scheduled tasks from Heroku is easy and you get complete control over timing and frequency.
Thank you to Chris Oliver for not only creating a great product, but also answer my questions on X and making me excited about my Rails servers again!